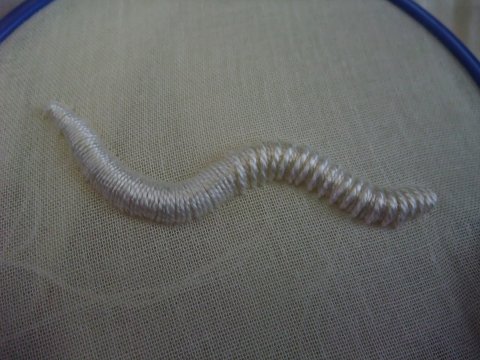
So Sharon B’s may challenge was casalguidi stitch.
I have to say that I never really liked the traditional casalguidi pieces, too many of them looked rather awkward and plump. I wanted to leave out this stitch and finish some of my other stuff instead. But as always Sharon’s stuff was too alluring so I ended up trying it anyway.
Well, my heart was screaming for something mixed media after all this long armed cross stitch on my assisi piece, so that’s what I’m gonna do. The surprise is for some other day, today I will just show how I learned casalguidi stitch.
So first you need padding. I used pearl cotton #3, probably the most expensive joice availiable, but that was what I hd on me on the commute that day. By the way, this is a picture of my second stab at the stitch, forgot to photograph that stage first time round.

I covered it with pearl cotton #8, fand used pearl cotton #5 for the foundation stitches and the raised stem stitch. Here I am halfway through the row of foundation stitches.

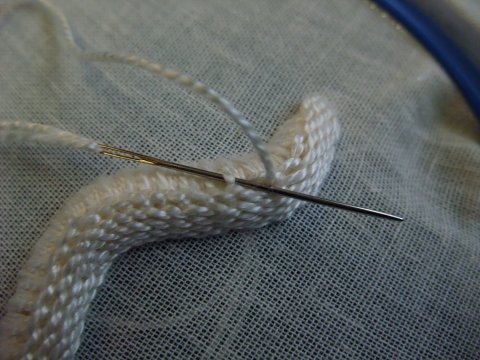
For the sake of completeness you can see here how the stem stitches over the foundation stitches are done. I just hope I’ve gotten that step right this time.

Well, I was going to stitch a grub or something similar, all this talk about this stitch looking like a grub on fabric made me do this. For this one, I had cut the batting so that the worm would be tapered at the ends, but now I had the problem that I needed more rows of stem stitch to cover its middle than at the ends. So I added some rows in the middle starting not at the end but a bit in, like shown. At the second end of the worm, I ended this row early the same way at the second end of the worm. The rows on the sides of the worm ran all along it’s ends.

Now meet the finished worm, photographed together with a pencil to give an impression of its 3d form.

And the same from above.

May 19th, 2009 at 12:19 am
At least yours was by intent!
LikeLike
May 20th, 2009 at 4:21 pm
Great job!! I love the look of Casalguidi, even though most of my stitching friends hate doing it. I love the sense of accomplishment you get from just doing one element!!
LikeLike
May 22nd, 2009 at 3:59 am
WOW! What a great effect!!!!! Bookmarked!!!!
LikeLike
May 25th, 2009 at 4:45 am
Reallr great work
LikeLike
July 31st, 2009 at 2:29 pm
[…] achieve the most simple pattern , you work raised stem stitch over the warp threads as shown. In weaving, you have to work to and fro. That means, if you have […]
LikeLike
May 4th, 2010 at 11:50 am
Followed the link from “Just String” here – this is a really clear demonstration of the stitch – thank you!
LikeLike
August 9th, 2011 at 7:28 pm
[…] a blog called Tenar’s Cave, you’ll find a nice photo tutorial on casalguidi stitch. This is a dimensional embroidery technique that involves stem stitching over a thick cord or bunch […]
LikeLike
April 24th, 2012 at 3:39 am
[…] guessed it–Casalguidi! Unfortunately, I neglected to take specific step-by-step pictures, but this site shows the progression of the […]
LikeLike
April 24th, 2012 at 3:42 am
[…] I don’t want to use a twig, but I want the dimension, so I’m going to use Casalguidi stitch (also known as padded stem stitch) in a brown overdyed […]
LikeLike
March 18th, 2013 at 5:55 pm
[…] stitches. I don’t want to use a twig, but I want the dimension, so I’m going to use Casalguidi stitch (also known as padded stem stitch) in a brown overdyed […]
LikeLike