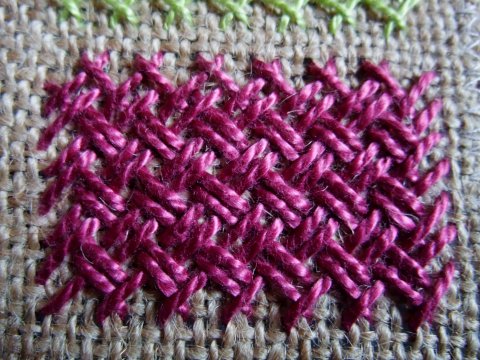
Now here is the herringbone filling from Elizabeths blog as promised. Sorry to all those I’m making fall asleep from boredom with this. It is so simple but took me much more time to figure out than more difficult stitches, and now I want to share the fun.
First, do a row of herringbone stitch as shown.
Start the next row 2 threads below the first one, working in the opposite direction.

At the top, the stitches of the second row are placed under the stitches of the first row.

Start the third and all following rows 2 threads under the previous one. Remeber to always work to and fro, and try to find comfortable working positions by turning the fabric between rows.

Here you see a few finished rows, and some more in pearl cotton 3 which gives better coverage on this fabric.

A closeup of the nicer section.

May 1st, 2009 at 1:59 am
Beautiful job! I love it – and the woven look! Very nice!
LikeLike
May 1st, 2009 at 9:39 pm
Thank you Mary! But it was Elizabeth who found this stitch and alerted me to its existence, so please have a look at her blog either.
LikeLike